Running your first job on the Raspberry Pi 2 / Jenkins
So in my last post Installing Jenkins on Raspberry Pi 2 I took us through the steps it took me to get a Jenkins server running on my Raspberry Pi 2 - but I didn’t actually run any jobs on the Raspberry Pi 2! Time to rectify.
So I decided to build doboz - a really awesome little compression/decompression library written by Attila Áfra. I first forked it from HG -> Git, and fired it up onto my GitHub here.
I did some minor cleaning up (removed the VC10 folder, moved COPYING.txt to LICENSE as is the GitHub norm) but all in all the remainder of the code was the same.
I then tried to add my first Jenkins job to pull this repo - but oh wait! Jenkins by default only has the CVS and SVN version control plugins installed, so I had to first at the Git SCM Plugin. After installing that, I created a simple job called doboz that pulled the repository, and huzzah! It worked!
Next up, to actually build the thing. Now I primarily use CMake for all my builds (it is awful in many ways, but it is cross platform and the LLVM project uses it so that is good enough for me) - so I added a CMakeLists.txt that would build a libdoboz.so for me. I then added a build step/execute shell that simply did;
And ran it… and it failed.
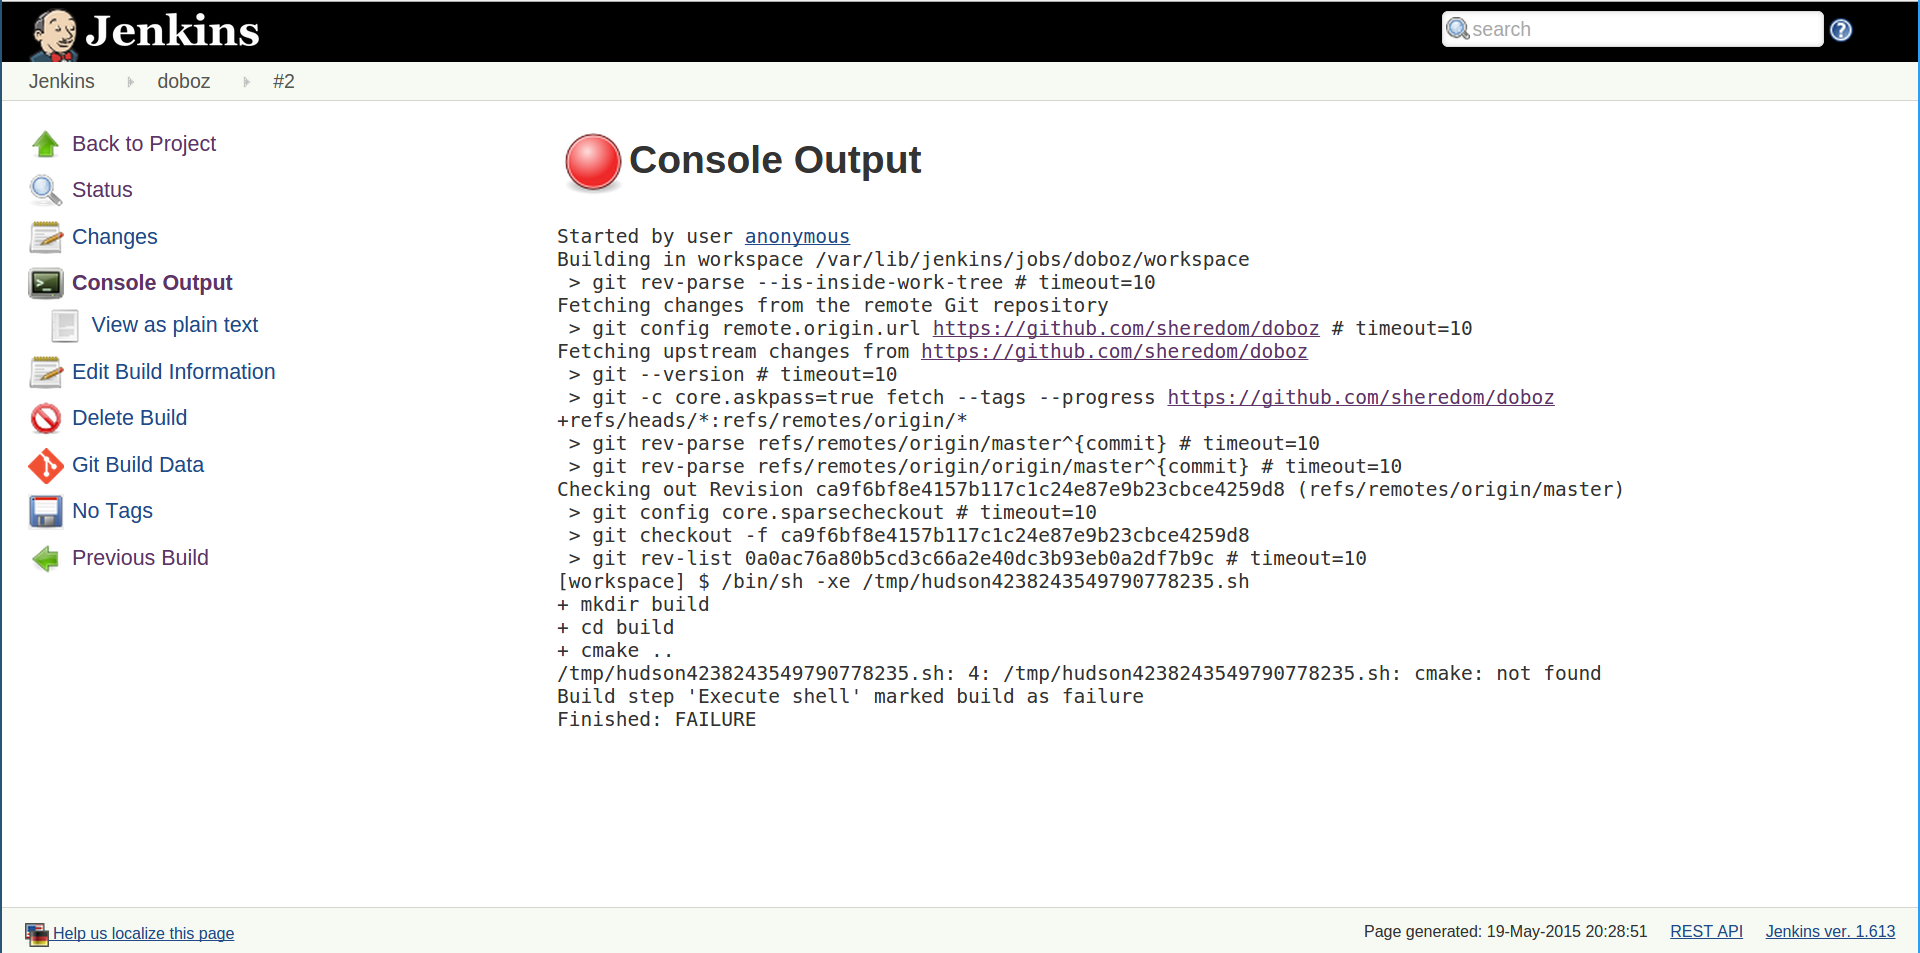
Basically CMake wasn’t installed by default on the Pi! So I ssh onto the Pi, run;
And then once it completes, I re-ran the Jenkins job, and it failed again.
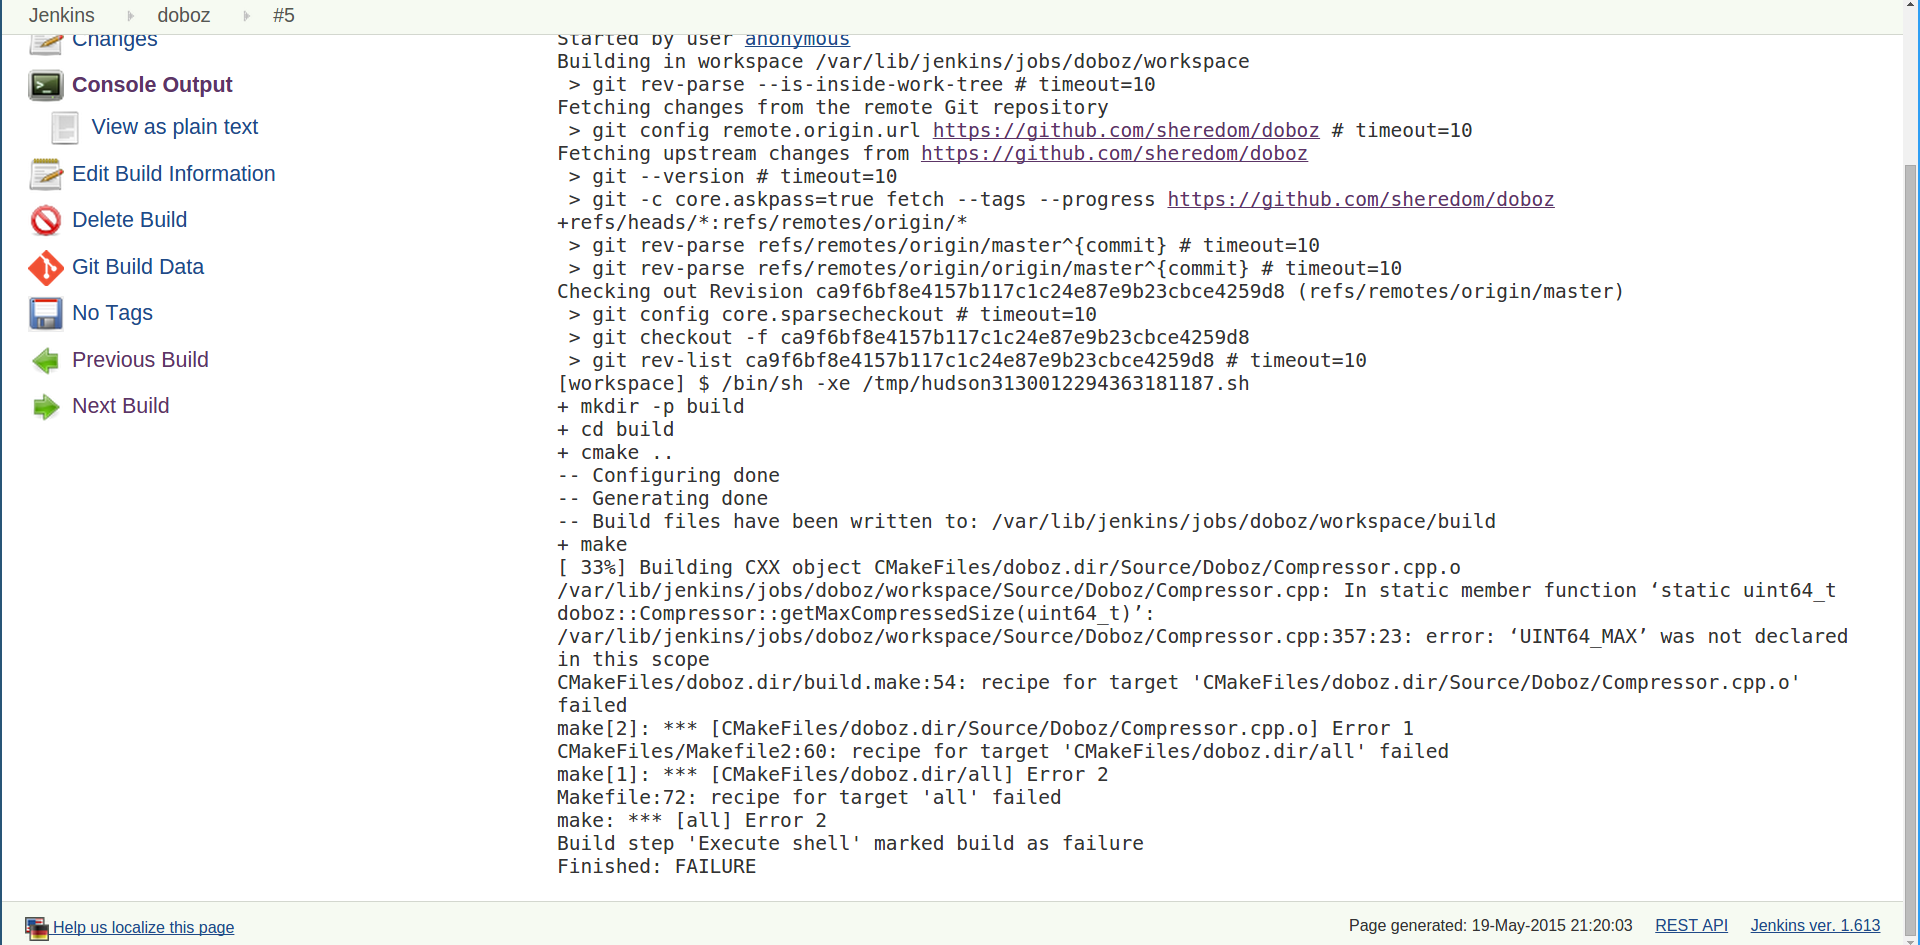
Luckily I recognized this error from a previous customer project, basically before including stdint.h on some wacky platforms you need to;
To actually get UINT64_MAX and all the other *_MIN and *_MAX defines.
I then ran the job again, and it passed.
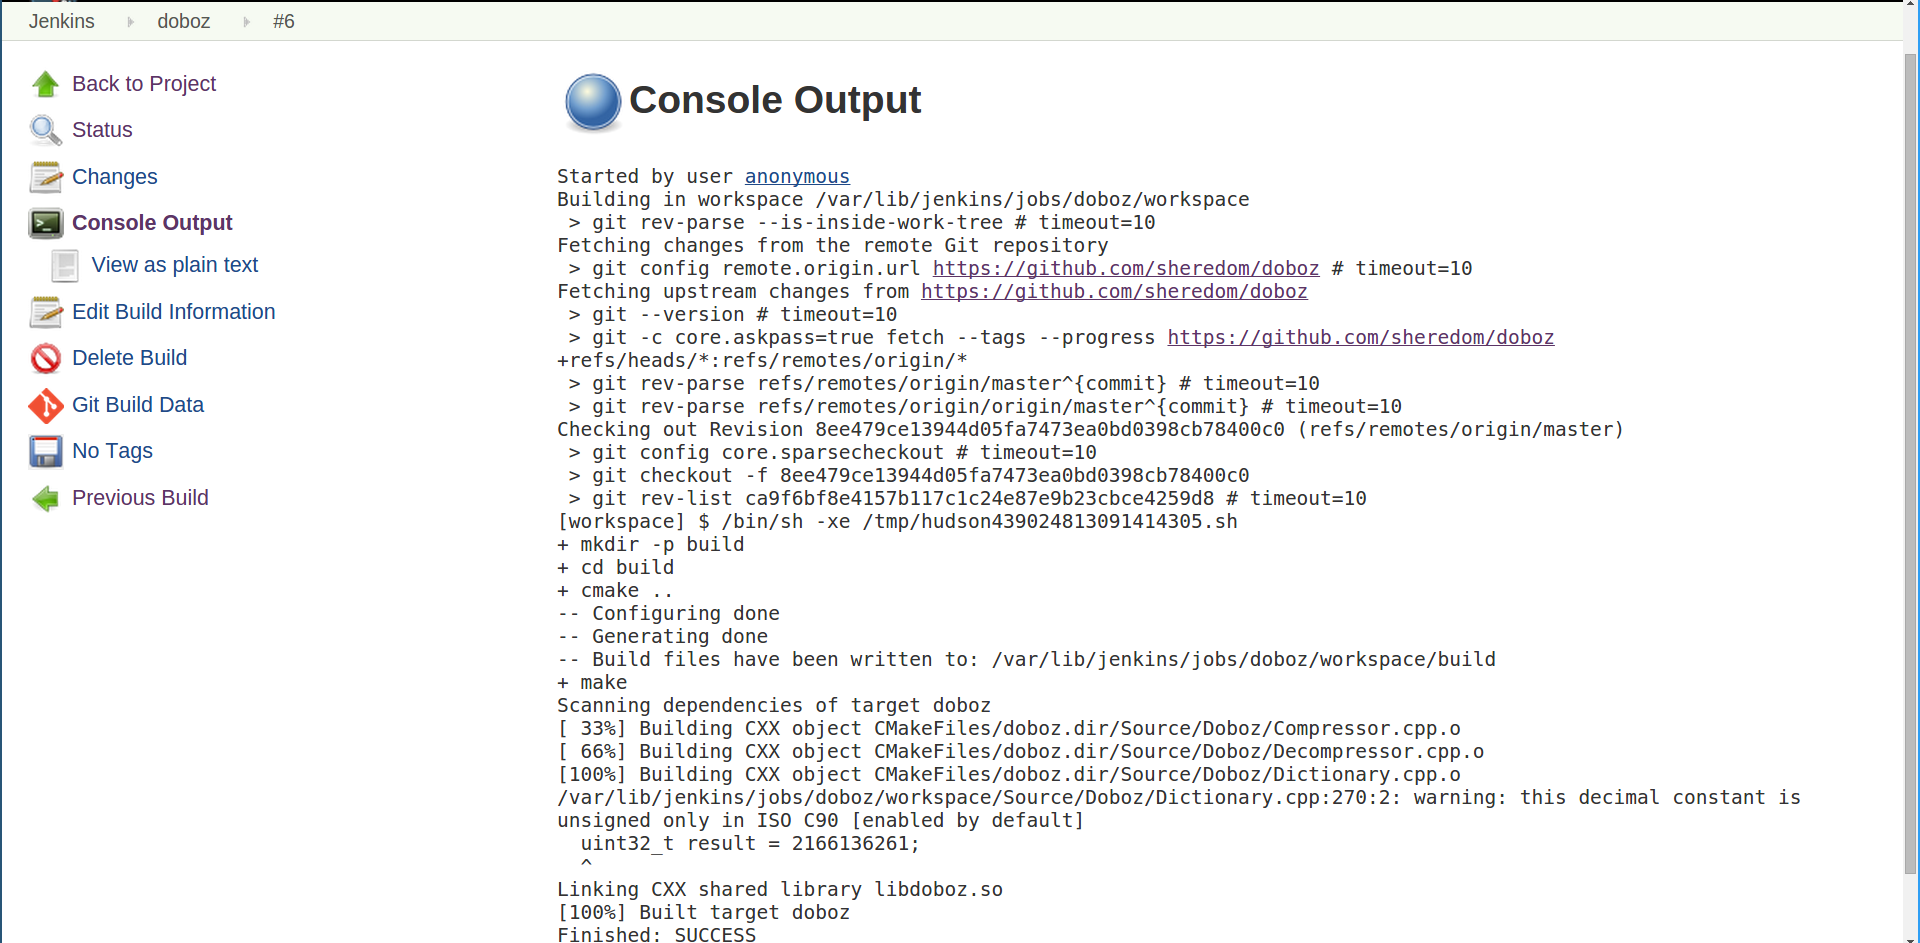
So there you have it! Our first job to run on our Jenkins / Raspberry Pi 2. In a follow-up post I’ll show you how to connect another build node to the Raspberry Pi 2, so that the job is actually being built on another machine entirely (which is entirely the point of Jenkins!).